
As a Solution Partner or Tech Provider, you have the capability to do the following on behalf of other businesses:
- Send and receive messages.
- Manage business accounts, phone numbers, and message templates.
- Assign users to the business account.
- Give access to your credit line.
For using these features we need ALL of the following permissions: whatsapp_business_messaging and whatsapp_business_management.
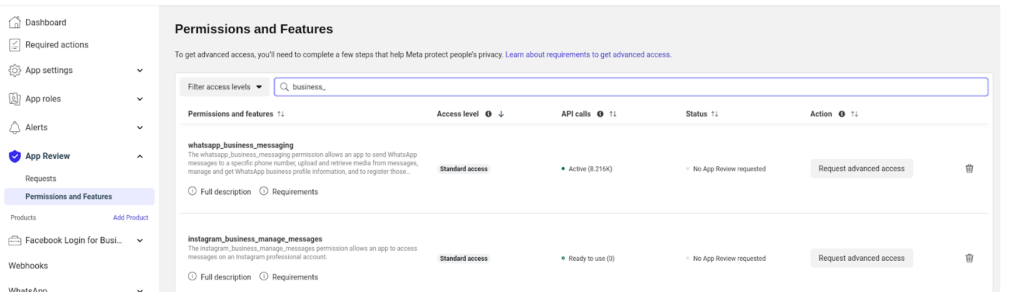
Sign into our developer account and select an app from your Apps panel. In the App Dashboard, click App Review, then click Permissions and Features.
Description of Data Usage
You need to explain how you will use the data that the whatsapp_business_messaging and whatsapp_business_management permissions allow your app to access.
Step 1– Click Request Advanced Access for each permission, then click Continue the Request.
Step 2-Under the Requested Permissions and Features section, click the Complete Form arrow for a permission.
Step 3
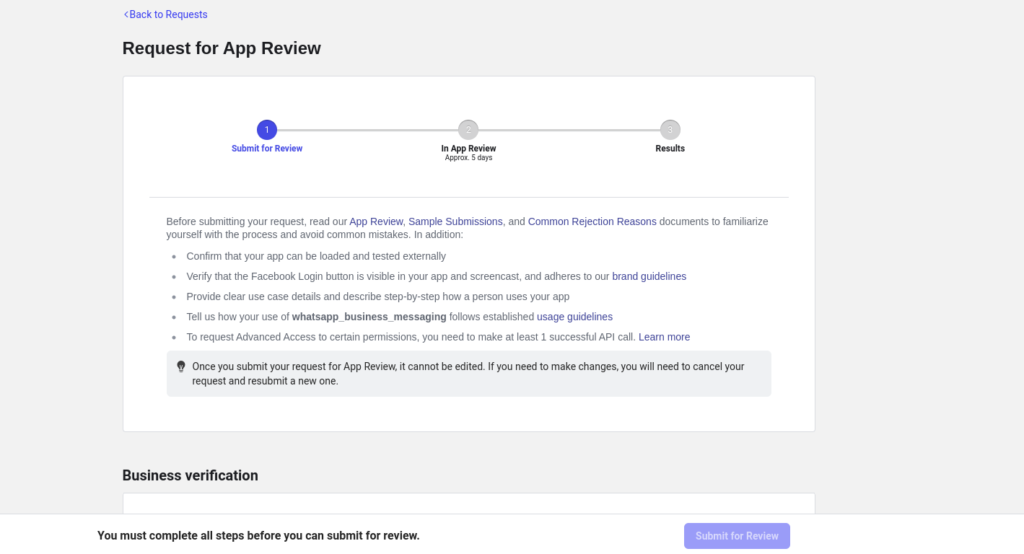
Step 4
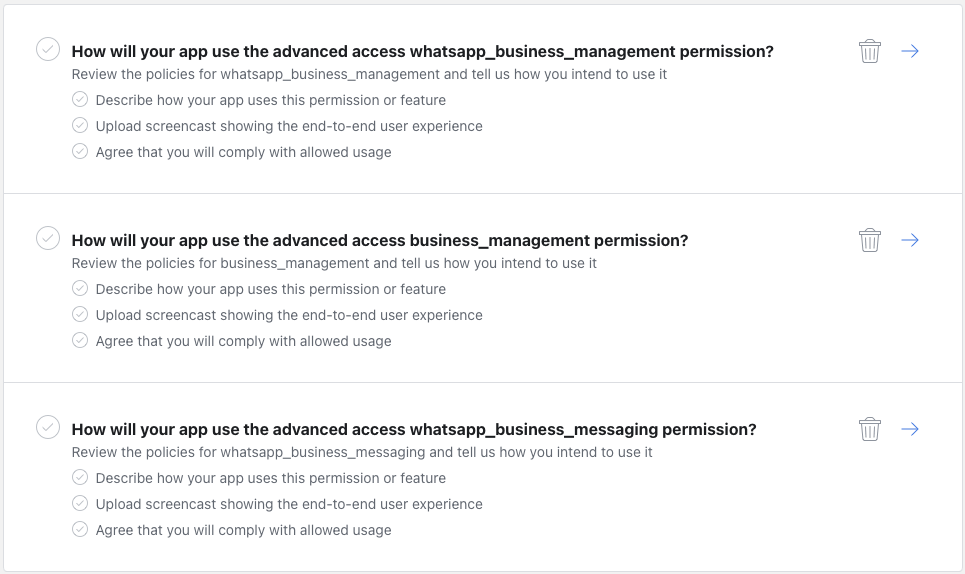
A pop-up dialog will appear where you will enter a detailed description of how your app uses the requested permission and upload a video walk through of your app. Fill out the form and click Save.
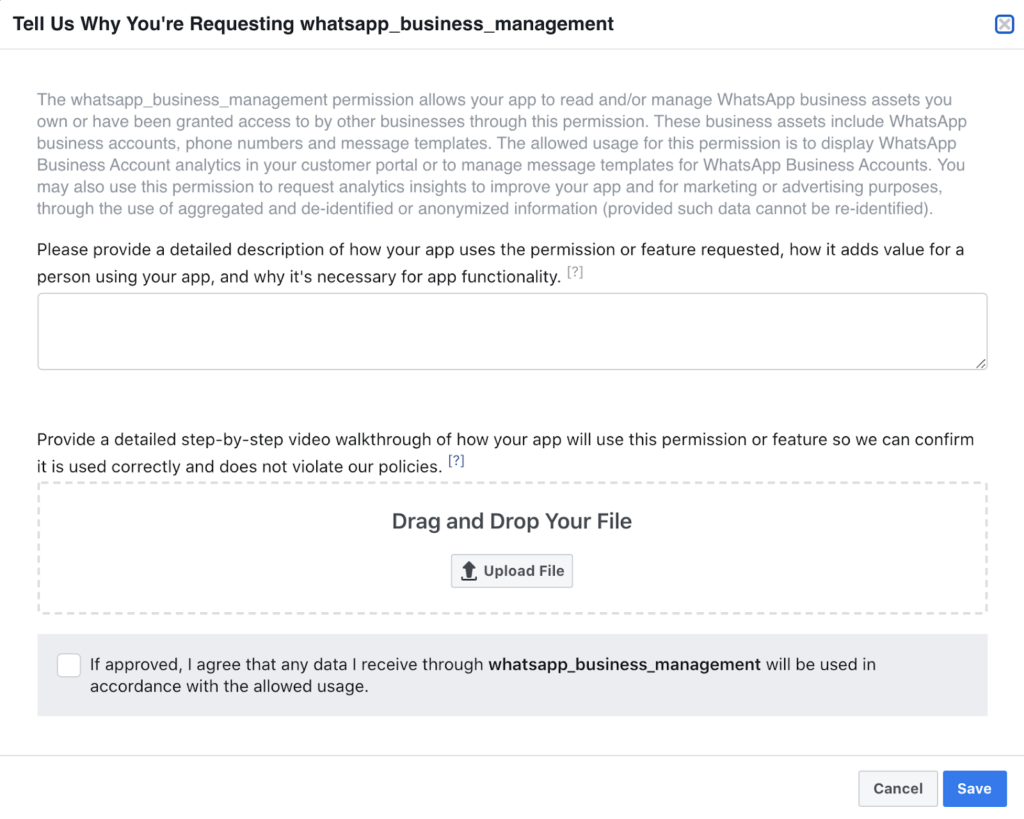
Description for the whatsapp_business_management permission
Provide a general description of what your app does, explaining how the whatsapp_business_management permission will provide value to your app users.
In the Tell Us Why You Are Requesting whatsapp_business_management section, most businesses that request this permission explain that they are a Solution Partner or Tech Provider and mention how and why they plan to use the service to manage their clients’ phone numbers and templates.
For the video walkthrough, upload a short video recording that shows clear evidence of how your application uses the whatsapp_business_management permission to support the above description by selecting Upload File.
Description for the whatsapp_business_messaging permission
Provide a general description of what your app does, explaining how the whatsapp_business_messaging permission enables your app to help other businesses engage with their customers.
In the Tell Us Why You Are Requesting whatsapp_business_messaging section, most businesses that request this permission explain that they are a Solution Partner or Tech Provider, and mention why they plan to use this service to send and receive messages.
For the video walkthrough, upload a short video screencast recording that shows clear evidence of how your business application interface uses the whatsapp_business_messaging permission to support the above description by selecting Upload File. You should take the screencast recording of the business-facing interface, not the consumer-facing experience
Example for entering Tell Us Why You Are Requesting pages_messaging section
“Open my Messenger bot by clicking the “Chat Now” button on my party planning company’s Page. This app provides helpful, personalized information for people trying to plan parties. It uses the Messenger Quick Reply mechanism to ask for the user’s location so we can give useful information about nearby party venues and similar questions. In our in-person interactions with customers, we have found what works best is building a personal relationship. Birthdays and other celebrations are very personal events. Customers will appreciate having the Party Chat Bot added to our Page so we can approximate this in-person relationship as closely as possible. To test the Amazon link in the chat, use test_user with password 1234.”
Our content for detailed description of app
To get started with the Guruch app, first register and log in. After logging in, add the Phone Number ID, Business Account ID, and Access Token from the Meta app. Then, copy the webhook URL, verify the token, and paste it into the app configuration. In the “Contacts” section, create a group and add contacts to it. Next, go to the “Templates” section and create the necessary templates. When you’re ready to send a campaign, navigate to the “Campaign” menu, where you can create a new campaign. During campaign creation, provide a name, select a template from the template’s dropdown, choose the groups, and modify any variables within the template if required. Once done, submit the campaign. To send the campaign to all contacts in the group, go to the campaign menu and click the “Run Cron” button. Finally, you can chat with saved contacts using the “Chat” option.
Important Links for Tech provider
https://developers.facebook.com/docs/whatsapp/solution-providers/get-started-for-tech-providers